By the Mirellé Team - Your trusted source for curated nail inspiration and expert beauty guidance.
Planning your bridal manicure might feel like just another checkbox on your massive wedding to-do list, but here's the thing - your hands are going to be in so many photos. Ring shots, cake cutting, bouquet holding, that first married hand-hold... every single one of those moments deserves flawless nails.
We've curated insights from top nail artists, real brides, and beauty experts to bring you everything you need to know about wedding nail designs. From the perfect timing for your appointment to the hottest trends for 2025, this guide covers it all. Whether you're going for classic elegance or something more modern, you'll find your perfect bridal look here.
Save these classic wedding nail designs →
What's Trending in Wedding Nail Designs Right Now
Wedding nail trends for 2025 are all about giving classic looks a fresh twist. We're seeing brides embrace personality while keeping that timeless elegance that photographs beautifully years later.
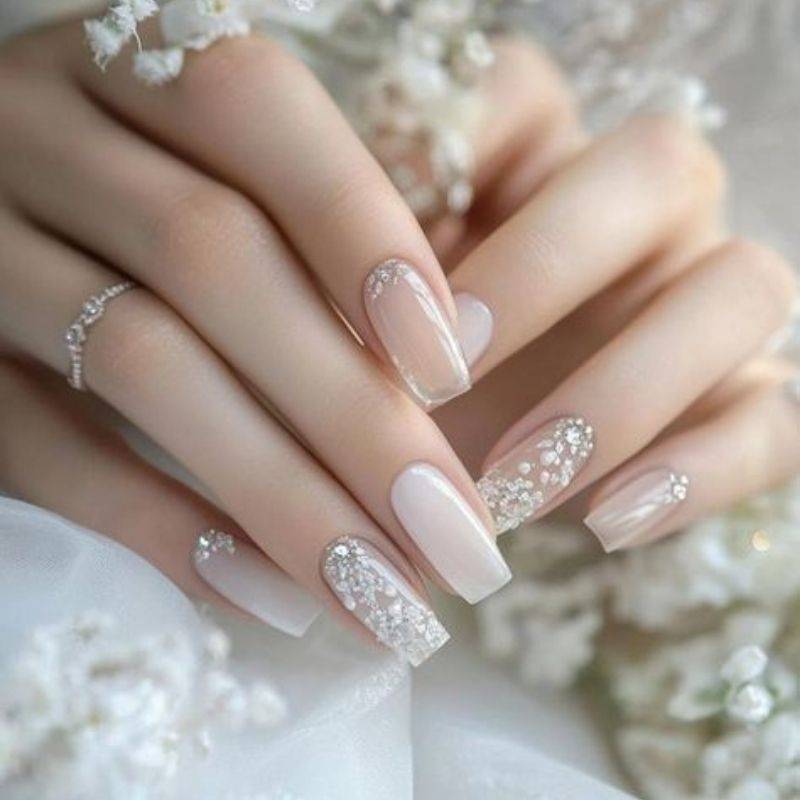
Minimalist bridal nails are having a major moment. Top nail artists are creating sheer milky pink bases with one or two accent nails featuring delicate gold foil or tiny pearls. The modern bride wants something understated that lets her ring be the star, and these designs deliver exactly that.
Chrome and glazed finishes are everywhere. That glazed donut effect gives this ethereal, almost holographic look that catches light beautifully in photos. We're obsessed with how it looks in both natural light during daytime ceremonies and under reception lighting at night. Beauty experts at The Knot and Who What Wear both named chrome finishes as one of the top bridal nail trends for 2025.
Natural nail movement is real. More brides are skipping extensions entirely and embracing their natural nail length with gel polish. It's refreshing to see people prioritize nail health over drama, especially when you consider how comfortable and practical shorter nails are for your big day.
Blush tones are the new neutral. According to celebrity manicurist Ann McFerran, founder of Glamnetic, blush pink is the biggest bridal nail color for 2025. It's warmer than traditional baby pink and more interesting than basic nude - perfect for brides who want something classic with a modern edge.
Pin these modern bridal nail ideas →
When Should You Get Your Wedding Nails Done?
Quick Answer: Get wedding nails done 2-3 days before your ceremony for gel or acrylics. This timing allows nails to fully cure and look fresh on your big day while giving you time to fix any issues.
According to nail experts and experienced brides across WeddingWire and Weddingbee forums, the sweet spot is 2-3 days before your wedding. Here's why this timing is absolutely crucial:
The 2-3 Day Window Works Because:
- Gel and acrylic have fully cured and hardened
- Any swelling or redness from cuticle work has gone down
- You have time to go back if something goes wrong
- Nails still look fresh and pristine
- You've adjusted to the length and shape
- Less risk of chips, breaks, or lifting
Goddess Maintenance nail salon experts recommend this same timeline: "We recommend brides get their nails done two to three days before the wedding to make sure their nails stay fresh, but they are not pressed for time with other wedding commitments."
Book your appointment early - like, as soon as you book your venue. Salons get absolutely slammed during wedding season (May through October), especially on Thursdays and Fridays. Multiple brides shared horror stories on wedding forums about waiting until two weeks before and finding every salon booked solid.
For different nail types:
- Gel manicure: 2-3 days before
- Acrylic or extensions: 3-4 days before (needs extra settling time)
- Regular polish: Day before or day of (chips too easily otherwise)
- Press-on nails: 1-2 days before
If you're doing at-home nails, schedule your DIY session for 2-3 days before. This gives you an extra day if you mess up and need to redo them.
Save this gel vs acrylic guide →
Gel vs Acrylic: Which is Better for Weddings?
Quick Answer: Gel nails are better for weddings if you have healthy natural nails. They look more natural in photos and feel lighter. Acrylics work best if you need length or have weak nails that need structure.
This is THE question we see asked most by brides. Let's break it down based on what nail professionals and real brides recommend.
Choose Gel If:
- Your natural nails are healthy and medium length
- You want a natural, lightweight feel
- You're doing a short honeymoon (gel lasts 2-3 weeks)
- You hate the feeling of heavy nails
- You want flexibility (gel has some give)
- Your photographer is shooting lots of close-ups
Gel looks incredibly natural in photos. The light catches it differently than acrylic, giving this soft, glossy finish that doesn't look artificial. For modern brides going for that effortless elegance vibe, gel is usually the move.
Choose Acrylic If:
- You need significant length added
- Your natural nails are weak or damaged
- You're going on a 2+ week honeymoon
- You want maximum durability
- You do a lot with your hands (acrylic is stronger)
- You're worried about breaking a nail
Real brides on WeddingWire forums shared that acrylics held up perfectly even after a week of wear, with minimal regrowth visible. However, multiple nail techs warn that acrylics can look thick in photos if not done properly. Make sure your tech files them thin and natural-looking.
The compromise? Builder gel or hard gel. It's stronger than regular gel but more natural-looking than acrylic. More salons are offering this now, and it's becoming the go-to recommendation for brides from nail professionals.
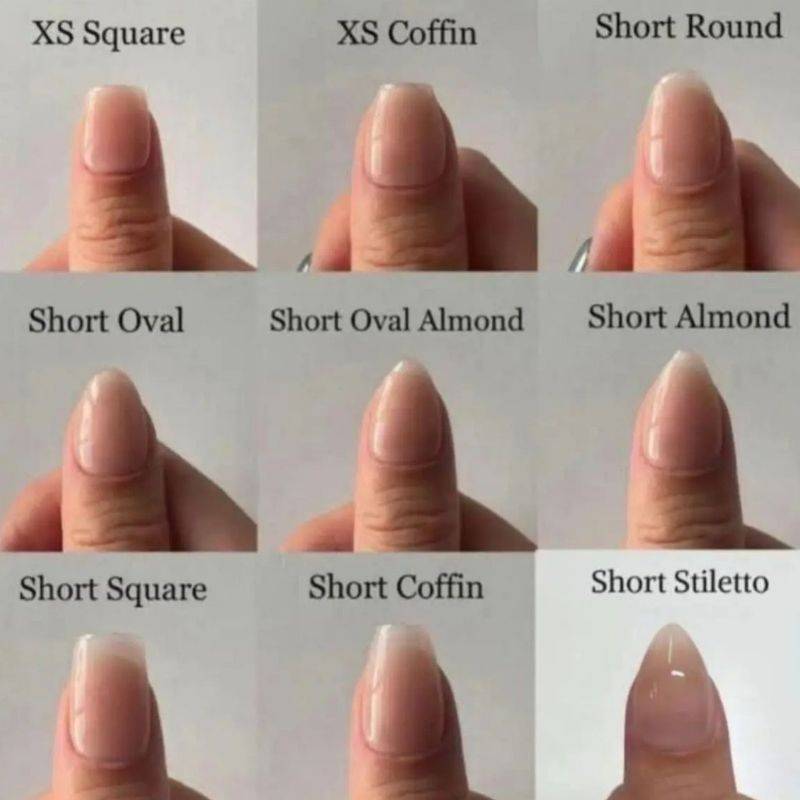
Best Nail Shapes for Wedding Photos
Quick Answer: Almond and oval shapes photograph best for weddings. They elongate fingers and look elegant with rings. Avoid extreme shapes like stiletto that can distract from your ring or look dated in photos years later.
Your nail shape affects how your ring photographs, how your hands look in portraits, and how comfortable you'll be signing your marriage license and cutting cake.
Almond: The #1 recommendation from nail artists for brides. It's feminine, elongates your fingers, and makes your ring the focal point. Not too dramatic, not too boring. This shape works with literally any dress style and never looks dated in photos.
Oval: Perfect if you want something softer than almond. Great for shorter nails or if you do a lot of typing. Photographs beautifully and feels very natural. Nail experts at Modern Gents recommend this for its timeless elegance.
Coffin/Ballerina: Super trendy right now and looks stunning if your fingers are on the longer side. On shorter fingers, it can make your hands look wider in photos. Be honest with yourself here.
Square: Classic and timeless, but can look a bit harsh in some wedding photos. If you love square nails, go for "soft square" where the corners are slightly rounded. It's a better compromise.
Stiletto: Multiple brides shared on forums that they struggled to put on their dress, hold their bouquet, and even hug people comfortably with stiletto nails. Plus, they can look really dated in photos 10 years from now.
Round: Understated and comfortable, but won't photograph as dramatically. Good choice if you have naturally short nails and don't want extensions.
Pro tip from nail professionals: Bring your engagement ring to your trial appointment. You need to see how the shape looks with your ring, not just on bare hands.
Choosing Colors Based on Your Skin Tone
Quick Answer: Soft pink works for cool undertones, peachy nude for warm undertones, and sheer white for neutral undertones. Choose a shade one or two tones lighter than your skin for a classic bridal look that complements any dress style.
This is where understanding your skin tone becomes critical. We've curated advice from color experts showing which shades photograph best on different skin tones.
Cool Undertones (pink/blue veins):
- Soft baby pink (like OPI's "Bubble Bath")
- Lavender-tinted nude
- Cool beige with pink base
- Sheer white with blue undertones
Avoid warm peachy tones - they'll clash with your natural coloring and can look muddy in photos.
Warm Undertones (green/olive veins):
- Peachy nude (like Essie's "Imported Bubbly")
- Warm beige
- Champagne gold
- Soft coral (if you're feeling bold)
Skip the cool pinks - beauty experts warn they can make your hands look sallow in photos.
Neutral Undertones (can't tell if veins are blue or green):
- True nude that matches your skin exactly
- Sheer white (like OPI's "Funny Bunny")
- Soft taupe
- Blush pink - the trending shade for 2025
According to Pronovias wedding stylists: Hold polish bottles up to your hand in natural daylight. If the color makes your skin look brighter and healthier, it's the one. If it makes you look tired or washed out, pass.
For dress matching: Ivory dress = warmer nude, pure white dress = cooler pink or sheer white. Your dress color affects how your nail color photographs more than you'd think.
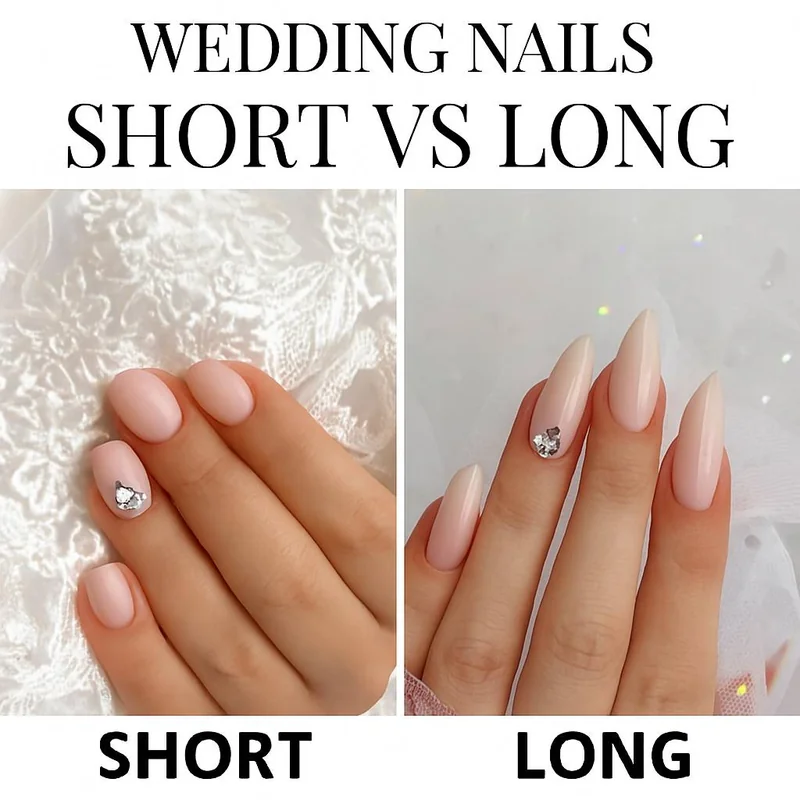
Wedding Nail Length: Finding Your Sweet Spot
Your nail length affects literally everything on your wedding day. Can you comfortably hold your bouquet? Sign documents? Put in earrings? Multiple brides on wedding forums shared struggles with nails that were too long for daily tasks.
Short Length (just past fingertip):
- Most practical for daily tasks
- Comfortable for ring fitting
- Less likely to break
- Can look less dramatic in photos
- Perfect if you're not used to long nails
Medium Length (1-2mm past fingertip):
- The Goldilocks zone for most brides
- Elegant without being impractical
- Photographs beautifully
- Comfortable for most activities
- Top recommendation from nail professionals for first-time extension wearers
Long Length (3mm+ past fingertip):
- Maximum drama and elegance
- Requires adjustment period
- Can be challenging for daily tasks
- Stunning in photos
- Only do this if you regularly wear long nails
Real advice from wedding forums - if you don't normally wear extensions, do NOT go long for your wedding. Get medium length and add 2-3 accent nails with extra length if you want drama.
Schedule your trial 4-6 weeks before the wedding at your desired length. Live with them for two weeks. If you're constantly frustrated, go shorter for the actual wedding day.
The Complete Wedding Nail Tutorial
Whether you're going pro or doing DIY wedding nails at home, here's the step-by-step process recommended by professional nail technicians.
What You'll Need:
- Base coat (OPI Nail Envy is highly rated)
- Your chosen color (gel or regular polish)
- High-quality top coat
- Cuticle oil
- Nail file (180 grit for natural nails)
- Buffer block
- Cuticle pusher
- Lint-free wipes (for gel)
- UV/LED lamp (if using gel)
Step 1: Prep Your Natural Nails (Do this 1 week before)
Start with a clean canvas. Remove any old polish completely. Gently push back cuticles - nail experts warn not to cut them unless absolutely necessary as this can cause redness and swelling. File nails to your desired shape using smooth, one-direction strokes.
Buff the nail surface very lightly to remove shine. This helps polish adhere better. But don't go crazy here - you're smoothing, not thinning your nail plate.
Step 2: Deep Conditioning Treatment (1 week before)
Apply cuticle oil twice daily for the week leading up to your nail appointment. Wedding stylists emphasize that healthy cuticles equal better-looking nails in photos.
Step 3: The Application (2-3 days before wedding)
Clean nails with alcohol or nail cleanser to remove any oils. Apply a thin layer of base coat - this is your insurance policy against staining.
Apply your color in thin, even coats. Two thin coats are better than one thick coat. Thick coats take forever to dry, bubble easily, and chip faster. Cap the free edge (run the brush along the tip) with each coat.
For gel: cure each layer according to manufacturer instructions. Don't skip or shorten cure times. Professional nail techs stress this is where most at-home gel manicures fail.
Finish with top coat, again capping the free edge. This seals everything and adds shine.
Step 4: Post-Application Care
Avoid water for 2 hours after regular polish, 30 minutes after gel. Apply cuticle oil around the nail bed daily. Wear gloves for any cleaning or dish washing.
Save this DIY wedding nail tutorial →
Pro Tips from Nail Experts:
- Bring inspiration photos but be realistic about your nail length and shape
- Test drive your design at your trial - don't debut a new technique on your wedding day
- Keep the design simple if you're doing DIY
- Pack a touch-up kit: your polish color, quick-dry top coat, nail file, cuticle oil
- If something chips, a quick layer of matching regular polish can save the day
Wedding Nail Mistakes to Avoid
We've compiled the most common mistakes from wedding forums and nail professionals. These disasters happen all the time and they're so easily preventable.
Mistake #1: Trying a New Nail Tech Right Before Your Wedding
Multiple brides on WeddingWire forums shared horror stories about trying new salons with cheap deals right before their wedding. Go to someone whose work you know and trust. If you don't have a regular tech, do your trial with them first.
Mistake #2: Going Too Trendy
Nail artists at Cosmopolitan warn that viral TikTok designs might be cute now, but will you cringe at them in your wedding photos in 10 years? Stick with classic designs with maybe one or two modern touches.
Mistake #3: Ignoring Your Lifestyle
If you work with your hands constantly or have a physical job, super long stiletto nails will make you miserable. Be honest about your lifestyle when choosing length and shape.
Mistake #4: Skipping the Trial
Would you skip a hair trial? No. Same logic applies to nails according to beauty experts at The Knot. You need to see how the design looks, test the length, and make sure you're comfortable.
Mistake #5: Last-Minute Changes
Wedding planners warn against changing your nail design the day before your wedding because you saw something on Pinterest. Stick with your plan.
Mistake #6: Forgetting About Your Honeymoon
If you're going somewhere tropical, consider how your nails will hold up. Long acrylics might not be ideal for snorkeling and beach activities according to destination wedding experts.
Frequently Asked Questions About Wedding Nails
When should I get my wedding nails done?
Get wedding nails done 2-3 days before your ceremony for gel or acrylics. This timing allows nails to fully cure and look fresh on your big day. Book early as salons get fully booked during wedding season.
Should I get gel or acrylic nails for my wedding?
Gel nails are better for weddings if you have healthy natural nails. They look more natural in photos and feel lighter. Acrylics work best if you need length or have weak nails that need structure.
What nail shape is best for wedding photos?
Almond and oval shapes photograph best for weddings. They elongate fingers and look elegant with rings. Avoid extreme shapes like stiletto that can distract from your ring or look dated in photos years later.
What color should I get for wedding nails?
Soft pink, nude, or sheer white work best for wedding nails. Choose a shade one or two tones lighter than your skin for a classic bridal look that complements any dress style and photographs beautifully.
How long do wedding nails last?
Gel wedding nails last 2-3 weeks with proper care. Acrylics last 3-4 weeks. Book your appointment 2-3 days before the wedding so nails look fresh and you have time to fix any issues.
Can I do my own wedding nails at home?
Yes, but only if you are experienced with gel or nail art. Practice your design at least twice before the wedding. For your actual wedding day, consider professional services to avoid stress and ensure perfect results.
Should my wedding nails match my dress or flowers?
Wedding nails should complement your dress, not match exactly. Stick with classic neutrals that work with everything. You can add subtle accents that nod to your flowers without being too matchy.
What length should wedding nails be?
Medium length works best for weddings - long enough to look polished but short enough for ring comfort and daily tasks. Aim for tips that extend just past your fingertip for the most flattering photos.
How much should I tip for wedding nails?
Tip 20-25 percent for wedding nail services. If your nail tech goes above and beyond or accommodates a tight timeline, consider tipping 30 percent or more to show appreciation for their expertise.
What if my wedding nails chip before the ceremony?
Keep a bottle of your nail color and top coat for quick touch-ups. If gel chips, apply regular polish in the same shade over the chip. For major damage, contact your nail tech immediately for an emergency repair.
Should I get a trial run for wedding nails?
Yes, schedule a trial 4-6 weeks before your wedding. This lets you test the design, see how it photographs, and make adjustments. It also helps you gauge how long the nails last and if the length feels comfortable.
Are press-on nails okay for weddings?
High-quality press-ons can work for weddings if applied correctly. They are budget-friendly and removable for your honeymoon. Choose a reputable brand, apply 1-2 days before, and bring backup glue for emergencies.
Bookmark this wedding nail timing guide →
Real Wedding Nail Inspiration
We've curated some of the most beautiful bridal nail designs from top nail artists and real weddings. These worked beautifully in photos and held up through entire wedding days.
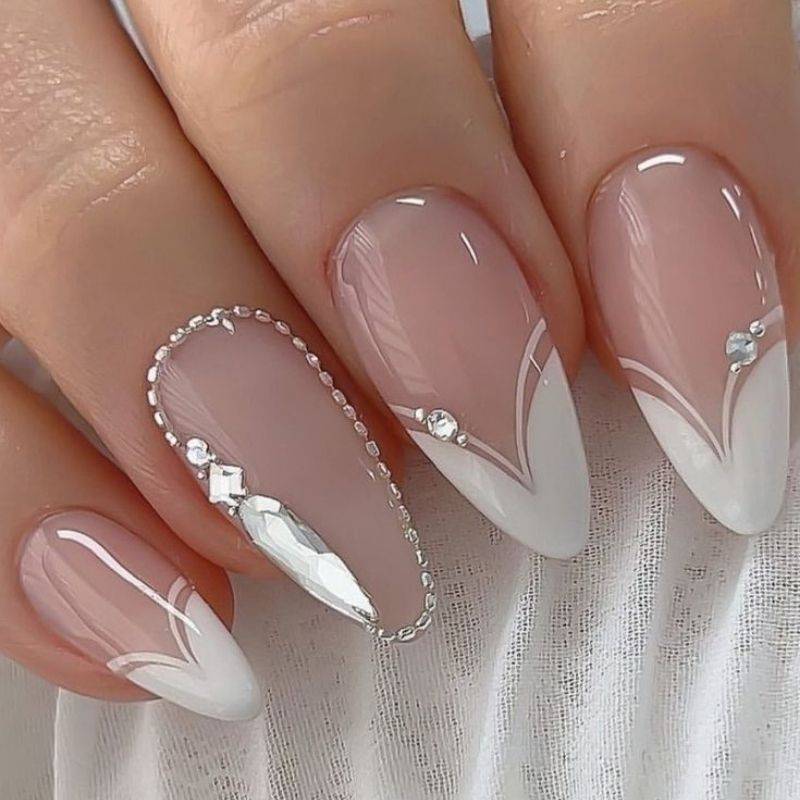
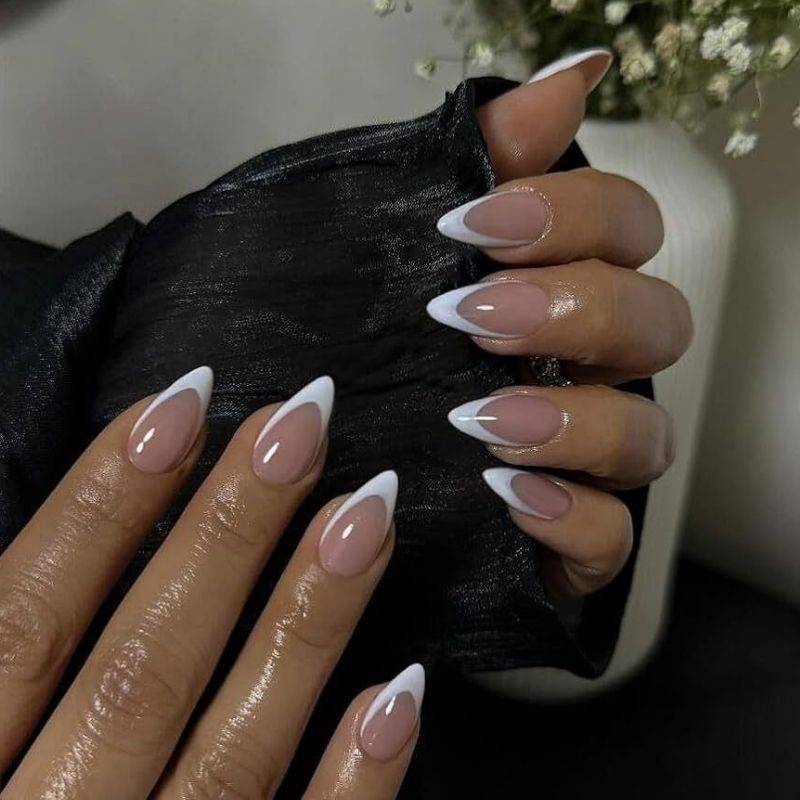
The Classic French with a Twist
Traditional french tips but with a sheer pink base instead of nude, and the tips are slightly thinner than traditional french. Modern, clean, and photographs like a dream according to Who What Wear editors. Works with any dress style and never looks dated.
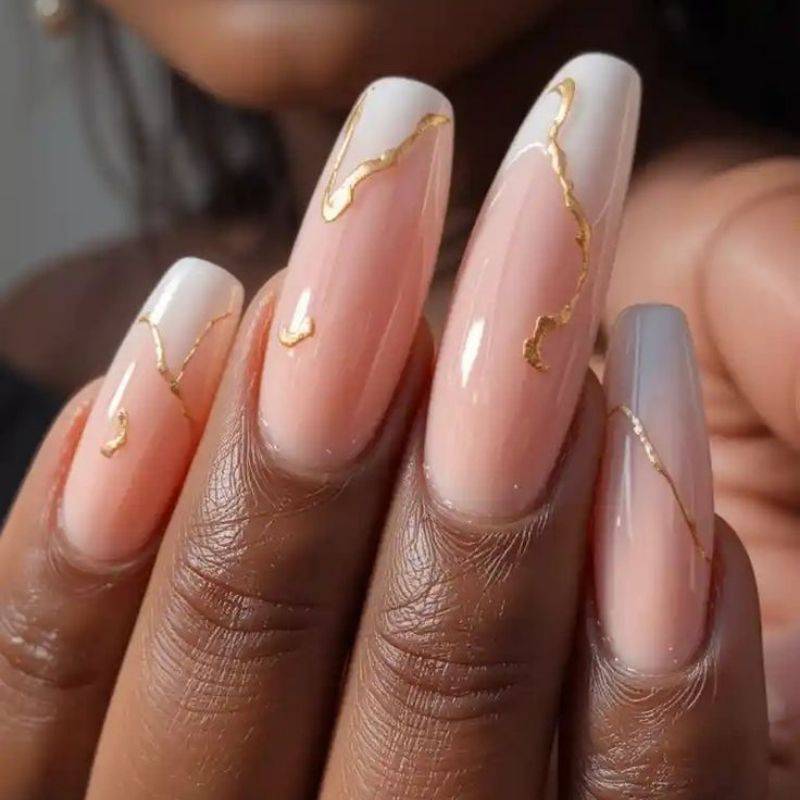
Minimalist Gold Accent
Sheer milky nude on all nails with one accent nail featuring a thin gold stripe down the center. Simple but special. The gold catches light beautifully in photos without being overwhelming. Featured in The Knot's 2025 wedding nail trends.
Glazed Donut Bride
That chrome glazed effect on short almond nails. Looks expensive, feels luxurious, and has this ethereal quality in photos. One of the most requested designs for modern brides according to Glamnetic founder Ann McFerran.
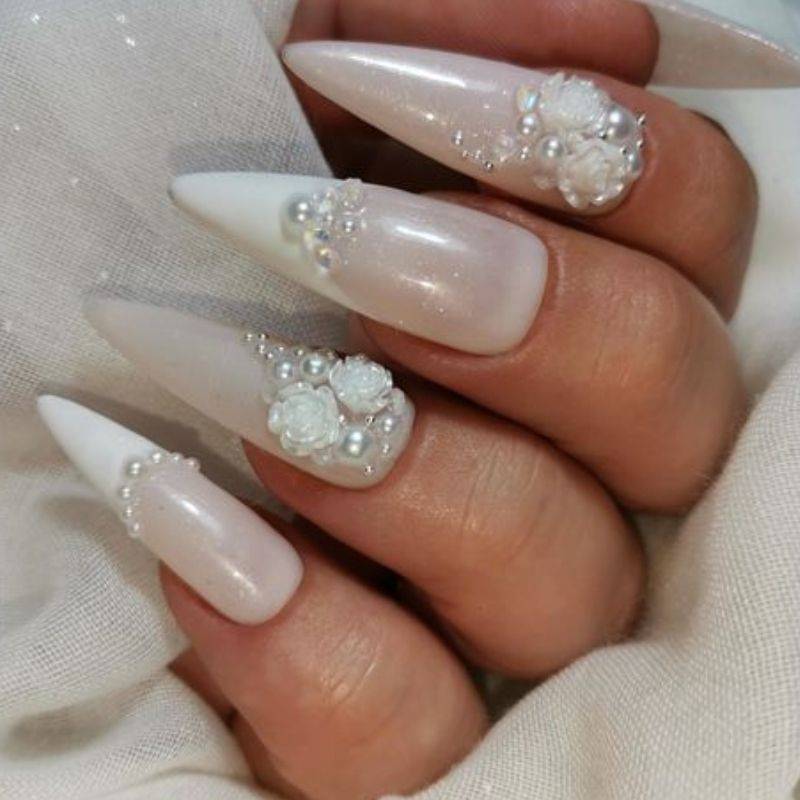
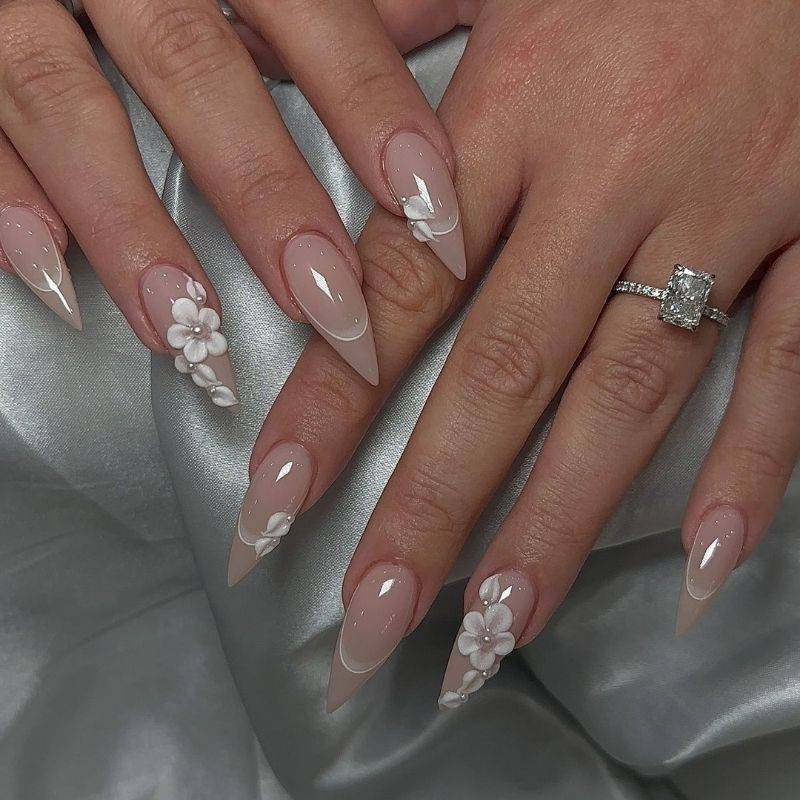
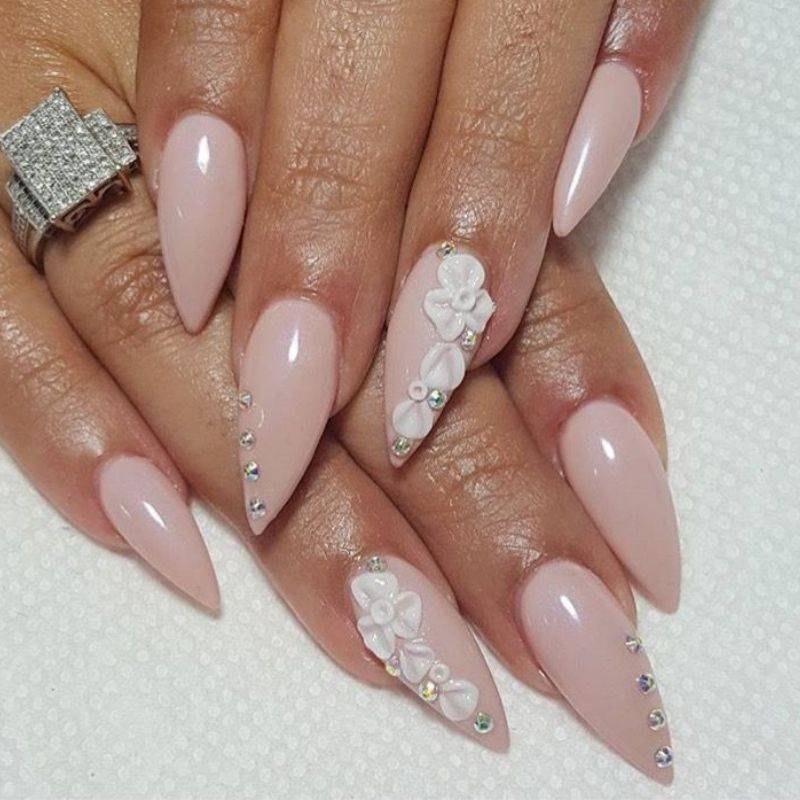
Soft Pearl Details
Nude base with tiny pearl embellishments on the ring finger only. CHANEL nail artist Betina Goldstein popularized peek-a-boo pearls underneath nails for a modern take on this classic bridal element.
Natural Nail Perfection
Sometimes the best design is just beautifully groomed natural nails with a sheer pink gel. This look never fails according to nail professionals. It's timeless, comfortable, and lets your ring be the absolute star.
For more design inspiration across different styles and seasons, check out our complete nail art guide and explore seasonal trends.
<a href="https://www.pinterest.com/mirelle_inspo/nail-tutorials-step-by-step-nail-art/" target="_blank" rel="no
Your Wedding Day Nail Emergency Kit
Pack this in your getting-ready bag. Seriously. Wedding planners across The Knot forums emphasize this has saved countless brides from nail disasters.
Must-Haves:
- Your exact nail polish color (even if you have gel, bring matching regular polish)
- Quick-dry top coat
- Nail file and buffer
- Cuticle oil
- Small nail glue (for press-ons or broken nails)
- Acetone and cotton pads (worst case scenario)
- Business card of your nail tech with their emergency number
Hand this kit to your maid of honor or wedding planner. If something goes wrong, they can handle it while you focus on getting married.